

Store-bought lip balms are packed with ingredients nobody can pronounce.
Flip one over and read the label. It looks like a chemistry textbook. No wonder people are ditching them and making their own lip balm.
DIY lip balm is natural, cheap, and takes less than 15 minutes to make.
Full control over what goes on your lips. No mystery chemicals, no weird preservatives.
This blog covers easy recipes, simple tips, and variations that actually work for different skin types, dry winters, brutal summers, and everything in between.
Why Make DIY Lip Balm at Home?
DIY lip balm is a homemade lip care product made using simple ingredients like beeswax, oils, and butters to moisturize and protect lips.
Most store bought lip balms fix dryness for an hour, then leave lips drier than before. Not great.
Making lip balm at home fixes that. Every ingredient is chosen by you. No fillers, no artificial fragrance, no questionable additives.
It works really well for sensitive lips and kids, too, since the formula stays clean and simple.
Everything needed is available at the nearest pharmacy or kirana store. Coconut oil, Vaseline, beeswax, done.
Want it tinted? Add beetroot. For flavor, add peppermint. Total freedom!
Dermatologists often recommend simple occlusive ingredients like petroleum jelly and natural oils to prevent moisture loss from the lips.
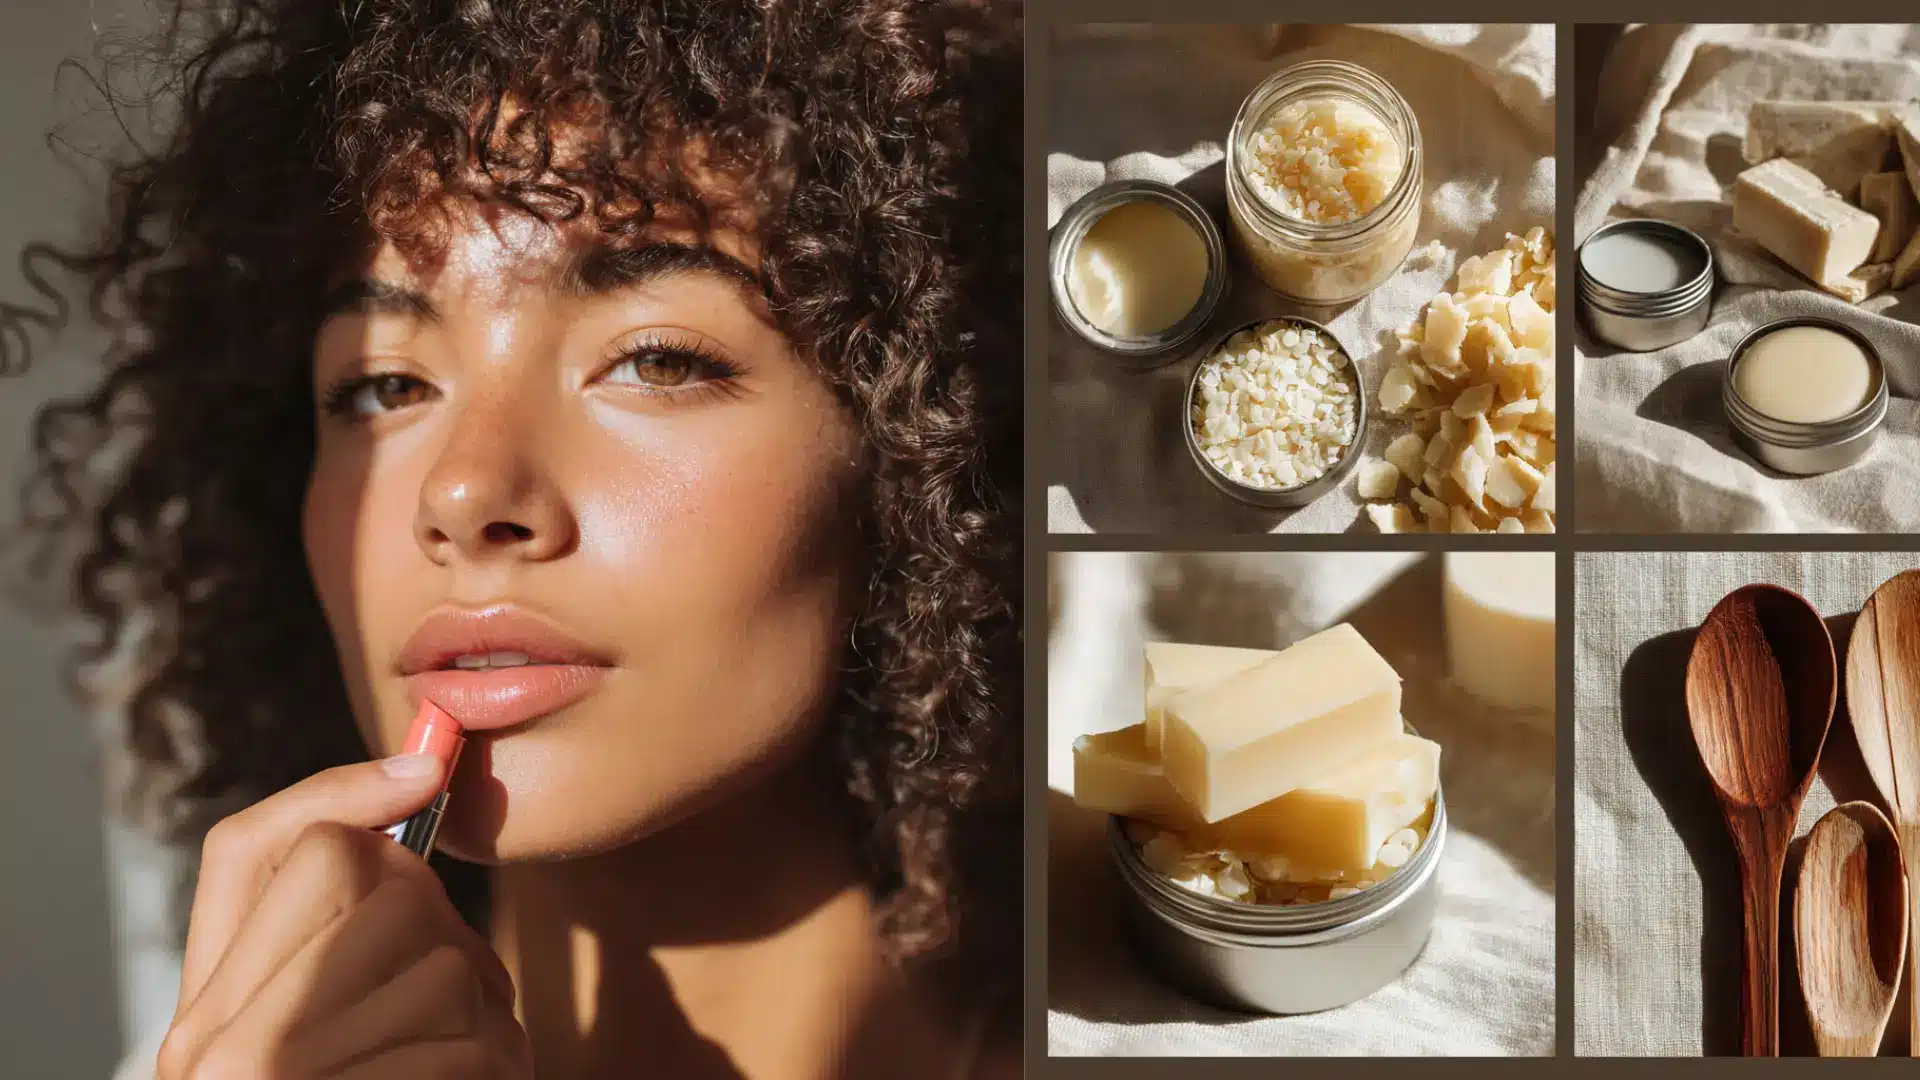
Ingredients Needed
Good lip balm does not need a long ingredient list.
In fact, three to four basic ingredients are enough to make something that actually works.
| What You Need | What It Does |
|---|---|
| Beeswax | Gives the balm structure and hold |
| Coconut Oil | Moisturizes and softens lips |
| Vaseline (Petroleum Jelly) | Locks in moisture, heals cracks |
| Shea Butter / Cocoa Butter | Nourishes and repairs dry lips |
| Beetroot Powder / Juice | Adds a natural pink tint |
| Small containers or tins | To store the finished balm |
| Double boiler or microwave | To melt ingredients safely |
A drop of peppermint oil for a cooling tingle, vitamin E oil for faster healing, a pinch of cinnamon for a natural plumping effect, or a little honey for extra softness. None of these are must-haves, but they make the balm feel more special.
DIY Lip Balm Recipe at Home
Three ingredients, fifteen minutes, one really good lip balm.
This is the most basic recipe and a great starting point before trying fancier variations.
Base Recipe:
- 1 teaspoon beeswax
- 1 teaspoon coconut oil
- 1 teaspoon Vaseline
Step 1: Measure Your Ingredients
Get the quantities right before starting. Use a small measuring spoon for each ingredient.
Eyeballing works but throws off the texture. Too much beeswax makes the balm rock hard. Too little makes it greasy and melty.
Stick to equal parts for this basic recipe and adjust later once comfortable with the process.
Wrong Ingredient Ratios. Too much beeswax and the balm feels like a crayon on your lips. Too much oil and it never sets properly. Always measure before melting.
Step 2: Melt the Ingredients
Place everything in a heat-safe bowl over a pot of hot water.
This is the double-boiler method. Stir gently as everything melts together. No double boiler?
A microwave works too. Heat in 20-second bursts, stirring between each round. Never leave it unattended in direct flame.
Overheating the Oils: High heat kills the good properties of coconut oil and shea butter. Keep the heat low and slow. If it starts smoking, it has gone too far.
Step 3: Mix It Well
Once everything is fully melted, stir for about a minute.
This ensures all ingredients are evenly combined. If adding beetroot powder, vitamin E, or any fragrance, this is the moment to do it.
Stir again after adding anything extra. A smooth, uniform mixture means a smooth, even balm.
Using Too Much Fragrance: One drop of essential oil is enough for a small batch. More than that and it irritates lips, especially sensitive ones. Less is always more here.
Step 4: Pour Into Containers
Work fast here. The mixture starts setting quickly once off the heat.
Pour slowly and steadily into small tins or containers. A small spoon or dropper helps with accuracy. Fill just below the rim. If it spills, wipe immediately.
Trying to fix an already-set balm by remelting affects the final texture.
Step 5: Cool and Set
Leave the containers undisturbed at room temperature for at least one hour.
Do not put them in the fridge right away, as this causes uneven setting and a bumpy surface on top. Once fully cool and solid, close the lids. The balm is ready to use.
DIY Lip Balm Variations
One base recipe, six different directions.
These variations cover every need, from vegan formulas to kid-safe balms to deep moisture for cracked lips.
1. DIY Lip Balm Without Beeswax (Vegan Option)
Beeswax is an animal product. This version skips it completely and still sets well.
- 2 teaspoons candelilla wax
- 1 teaspoon coconut oil
- 1 teaspoon shea butter
Candelilla wax is plant-based and stronger than beeswax, so less is needed. Melt, pour, set. Done.
2. DIY Lip Balm With Vaseline
The quickest version on this list. Two ingredients, five minutes, solid results.
- 2 teaspoons Vaseline
- 1 teaspoon coconut oil or shea butter
Melt both, stir, pour. Great for mild dryness and perfect for beginners.
3. DIY Lip Balm With Vaseline and Coconut Oil
One of the most popular combos for a reason. Both are easily available across India and work really well together.
- 2 teaspoons Vaseline
- 1 teaspoon coconut oil
- A few drops of vitamin E oil (optional)
Light, non-sticky, absorbs fast. Works well for daily use in both summer and winter.
4. DIY Lip Balm for Dry Lips
Cracked lips need something heavier. This one is loaded with moisture and stays on longer.
- 1 teaspoon beeswax
- 1 teaspoon shea butter
- 1 teaspoon cocoa butter
- 1 teaspoon coconut oil
Apply at night before sleeping. Wake up to noticeably softer lips.
5. DIY Lip Balm With Beetroot (Natural Tint)
A natural pink tint without any artificial dye.
- 1 teaspoon beeswax
- 1 teaspoon coconut oil
- 1 teaspoon Vaseline
- Half a teaspoon of beetroot powder or fresh beetroot juice
Add beetroot at the mixing stage and stir well. The tint is subtle and buildable.
6. DIY Lip Balm for Kids
Simple, fragrance-free, and gentle enough for small children.
- 2 teaspoons coconut oil
- 1 teaspoon beeswax
- Half a teaspoon of honey (skip for kids under one year)
Mild, edible-safe, and works well even when kids lick their lips constantly.
Storage & Shelf Life Notes!
Homemade lip balm lasts anywhere from 3 to 6 months, depending on the ingredients used.
Coconut oil and shea butter based balms tend to go rancid faster in heat, so storage matters more than most people think.
Keep the balm in a cool, dry spot away from direct sunlight and humidity.
A bedside drawer, bathroom cabinet, or small pouch in a bag works perfectly. Avoid leaving it in a hot car, near a window, or in direct sunlight.
If the balm starts smelling off, changes color, or feels grainy on the lips, toss it and make a fresh batch.
Final Thoughts
DIY lip balm is cheap, natural, and takes less than 15 minutes to make.
Start with the basic recipe, get comfortable, then try the variations. Beetroot tint, vegan version, kids formula, there is a lot to play with.
Make a batch, try it for a week, and see the difference. Share the results and let others know which variation worked best.
Frequently Asked Questions
1. Can DIY Lip Balm Be Used as an Overnight Treatment?
Yes, apply a thick layer before sleeping, and it works as an intensive overnight treatment for dry, cracked lips.
2. Does Homemade Lip Balm Work on Pigmented Lips?
Consistent use of coconut oil and vitamin E-based balm helps lighten pigmentation slowly over time.
3. Can Lip Balm be Made Without a Double Boiler?
A microwave works just fine, heat ingredients in 20-second bursts and stir between each round.
4. Is it Safe to Use Essential Oils in Lip Balm?
Yes, but only one drop per batch since anything more irritates lips and causes a burning sensation.
5. Can the Recipe be Scaled up for Gifting?
Absolutely, just multiply the quantities, pour into small decorative tins, and they make really thoughtful handmade gifts.